Monday, 10 October 2011

Chocolate Fudge Squares


The weather is getting colder, and everyone is starting to wrap up and turn up the heating. Times like these call for comfort food- and what isn't more perfect than a little bite of heaven....fudge! Highly calorific, but oh sooooo heavenly!


Ingredients:
225g digestives
225g butter
 225g caster sugar
397g condensed milk tin
cooking chocolate 


Equipment:
saucepan
square tin
rolling pin
wooden spoon
freezer bag (or teatowel)


Step 1:
Weigh out 225g of butter and sugar and melt them in a pan on a medium heat. Continuously stir until it has all melted, and then add the condensed milk.
    Step 2:
Weigh out the digestive biscuits and put them in a freezer bag. Tie a knot in the bag and smash the biscuits into small crumbs.


Step 3:
Add the digestives to the pan and stir. When the ingredients are thoroughly mixed take the pan off the heat and pour into the tin. Use a knife to smooth over the top.


  Step 4:
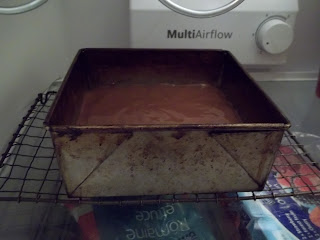
Place the tin into the fridge to cool. Placing it ontop of a cooling rack or something similar will help cool down the base of the tin.


Step 5: 
Snap the chocolate into squares and place onto a plate over boiling water in a pan. Stir gently and remove from the heat once it has all melted.


Step 6:
Take the fudge out of the fridge and pour the chocolate over it. Then smooth it over with a knife. Then place it back into the fridge for about 3 hours until the chocolate has hardened. 


Step 7:
Take the fudge out of the fridge and, with a sharp knife, carefully cut even squares. You may need a fish slice to get them out as it is a little tricky!


 Enjoy! Hope you've enjoyed this post!

<3<3<3
   

Saturday, 1 October 2011

Lemon Biscuit Swirls

Hello lovelies! So...this is my first post. I hope you enjoy it! 


This is my all-time favourite biscuit recipe as it is so simple to make once you've had a couple of tries but yet effective. Its also fun and bright- perfect for anyone at any occassion. They also make really cute gifts!
So...lets get to it! 

Ingredients:
75g (3oz) icing sugar
150g (5oz) softened butter
a lemon
200g(7oz) plain flour
2 tablespoons milk
food dye


Equipment:
baking bowl
additional bowl
sharp knife
cling film
cheese grater
cooling rack
rolling pin
spatula
mixing spoon
greased tray

Step 1:
Measure out 75g of icing sugar and 150g of butter and add to the bowl. Then stir it together. Cutting the butter into smaller cubes makes it easier to mix.


Step 2:
Once it has been thoroughly mixed, grate the lemon rind (on the smaller holes of the grater) and  add to the mixture.


Step 3:
After adding the lemon rind, weigh out 200g of plain flour and add that in too. Then give it another stir.


 Step 4:
Once the mixture has resembled a thick dough, add two tablespoons of milk. Then give it another stir. If (like me) you added to much milk and it is too wet, add some more flour!
Step 5:
Split the dough roughly into two and put them in seperate bowls.Then add a little food colouring to one of them...i used a little red to make a pink which worked well but you can use any colour!
 Step 6:
When you have mixed the food colouring in, wrap the two dough balls in cling film and pop them in the fridge for half an hour. Then, take out the plain dough and roll it into a rectangulair shape. 
 Step 7:
Once you have rolled the plain dough, get the coloured dough out and roll that too. Then place one on top of the other and cut them together so that they are the same shape and size. 
 Step 8:
 Once you have done this, you need to carefully roll it up from a long side. Dont worry if parts break (mine did loads!) - just push it back into place. Then wrap in cling film and put back in the fridge for 30 mins.
Step 9:
Once you've taken the roll out, chop the rough ends off. Then slice it carefully into even little circles and pop them onto a baking tray. I cut mine quite thinly, so i ended up with 30 biscuits. 

 Step 10:
Put them in the oven for about 15 mins at 180C/350F/gas mark 4. Dont put them back in if they feel too soft- the biscuits will harden when they have cooled! Place them onto a baking rack and your done!


I hope you have enjoyed this post, and maybe tempted to make your own. Have a lovely weekend!

<3<3<3